The Importance of Website Speed optimization
A website’s loading time is critical to its success. If your site takes too long to load, visitors may become bored and leave. This could result in a decrease in traffic and negatively impact your SEO ranking. Therefore, optimizing the speed of your WordPress site is crucial.
In this article, we will discuss WordPress speed optimization. We often find ourselves searching for ways to reduce site loading times, but sometimes we cannot find effective solutions.
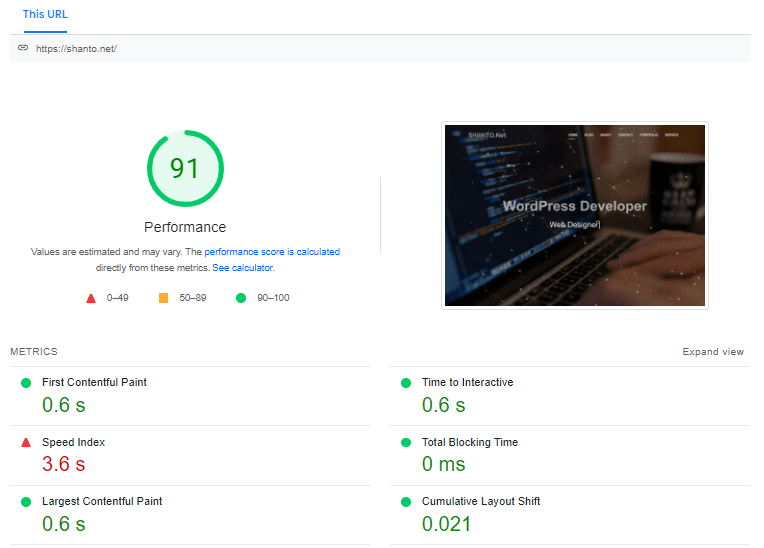
Before optimizing your site, it’s essential to know its current loading time. You can use tools such as Gtmatrix, Google PageSpeed Insights, and Pingdom to check your site’s current loading time. Make sure to note this somewhere for reference.
Here are six steps to follow to increase your site’s speed:
Step 1: Reduce the number of CSS and JavaScript files on your site. Also, call all of the JavaScript files at the footer of the site.
Step 2: Minimize the number of plugins you use. Delete unused plugins from your site dashboard and try to use as few plugins as possible.
Step 3: Set up free Cloudflare CDN on your site to make it more secure.
Step 4: Optimize your images. Image size is one of the main causes of slow loading times. To optimize your images, use the reSmush.it plugin. This plugin works great for reducing image size, and it’s free to use.
Step 5: Install the Jetpack plugin on your site and activate it. Set up a Jetpack account by creating an account on WordPress.com. Then, go to the performance tab and enable site accelerator and lazy loading for images. Afterward, go to the security tab and enable downtime monitoring.
Step 6: Install the W3 Super Cache plugin, which is one of the most popular caching plugins in WordPress. Once you’ve activated the plugin on your WordPress site, go to the general settings option and enable page cache, browser cache, and optimize disk-enhanced page and minify disk caching for NFS. Then, save all settings.
Next, go to the page cach option and enable cache feeds, cache preload, and cache SSL (HTTPS). If your site has an SSL certificate, you should enable SSL caching. Otherwise, leave it disabled. Additionally, enable “Don’t cache pages for following user roles” and check the administrator and editor options. Finally, save all settings.
Now, go to the browser cache option and enable the first six options and keep the others as default. Click the save all settings button.
Finally, go to the extension option and activate the Cloudflare extension. Authorize it with an API key from your Cloudflare CDN account, which you previously set up. Add your email address in the same popup, and select your site domain.
Step 7: If possible, consider upgrading to a dedicated hosting server.
If you want to speed up your site and need the assistance of a freelancer, feel free to contact me. I will provide you with the best service according to your satisfaction.